Tag: Everest Trekking

  • Three Passes in Everest: Ideal for Adventure Photography

    Three Passes in Everest: Ideal for Adventure Photography

    Three Passes in Everest: Ideal for Adventure Photography

    Nepal’s Three Passes Everest trek is an experience of a lifetime for dedicated trekkers and photographers and offers some of the world’s most breathtaking scenery in the highest mountain range on earth, unspoiled beauty, alpine severity, and living cultures. Whether you’re an adventurer looking for your next high or photographer looking for real awe-inspiring landscapes, the Three Passes trek is one you’ll never forget.

    Here, in this blog, we will be discussing why the Three Passes trek is a non-typical adventure photography experience compared to the rest of the treks of the region, why the trek is unique, how and when to do it as much as best time and, tips on how to make it happen for you along the way.
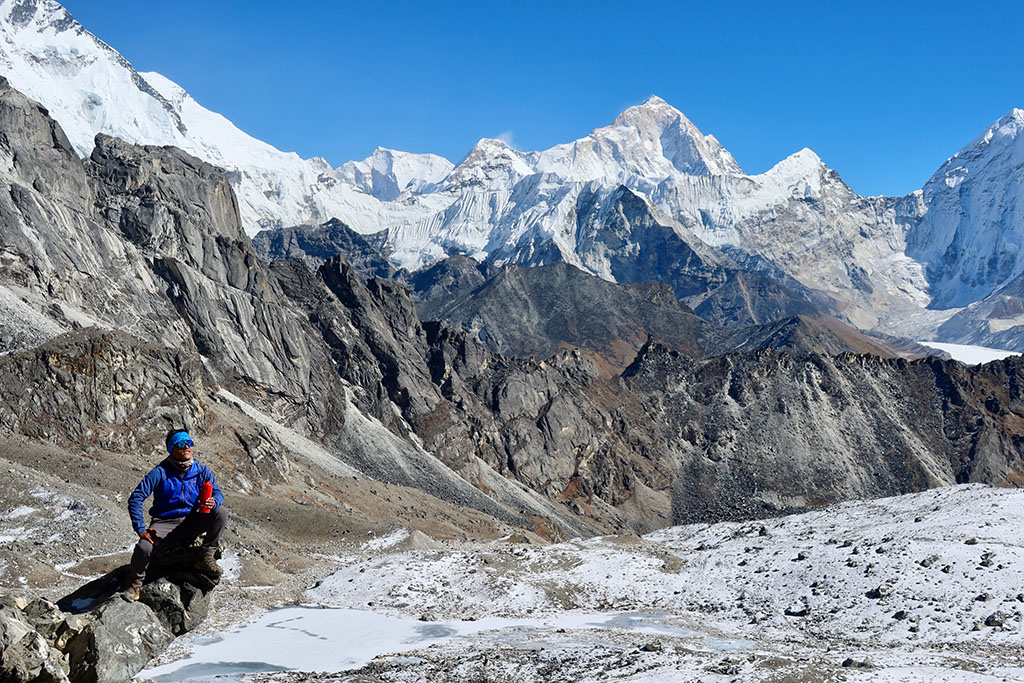
    Three Passes Trek

    What is the Three Passes Trek?

    Three Passes trek is a high altitude trekking tour in Nepal with three high mountain pass crossings of the Everest region, i.e., Kongma La (5,535m / 18,159ft), Cho La (5,420m / 17,782ft) and Renjo La (5,340m / 17,520ft). The trek is one of the most satisfying but challenging treks of the country, apart from providing the trekkers with stunning views of Mount Everest, Lhotse, Makalu and other peaks, also provides pristine landscape of the Khumbu valley.

    It is longer and more challenging than the standard camp (EBC) trek and requires greater physical conditioning and technical expertise. It is of 18-22 days depending on the route followed and is marked by trekking on challenging trails such as glaciers, rocky ridges, and snow passes.

    Below is a very brief overview of each of the three passes of the Three Passes trek:

    1. Kongma La (5,535 m / 18,159 ft)

    The Kongma La is the highest trekking pass and provides one of the most challenging but gratifying experiences for trekking adventure seekers. It is a steep and rocky pass situated between the Lobuche and Chhukung valleys and demands physical stamina as well as technical know-how, particularly in winter or spring when snowfall accumulation renders the route even more challenging to climb. Kongma La ascent is walking on rock trails, loose scree, and snow, but once the top is achieved, the scenery is ispicture-perfectlyy stunning. Panoramic vistas of Everest, Lhotse, Nuptse, and other neighboring peaks from the summit are a photographer’s delight to capture outstanding high-altitude photographs. Climbing the summit of Kongma La is tiring, but the thrill of doing this pass is indescribable. The trek to the pass is a great trek and one of the most stunning mountain views on the entire trek.
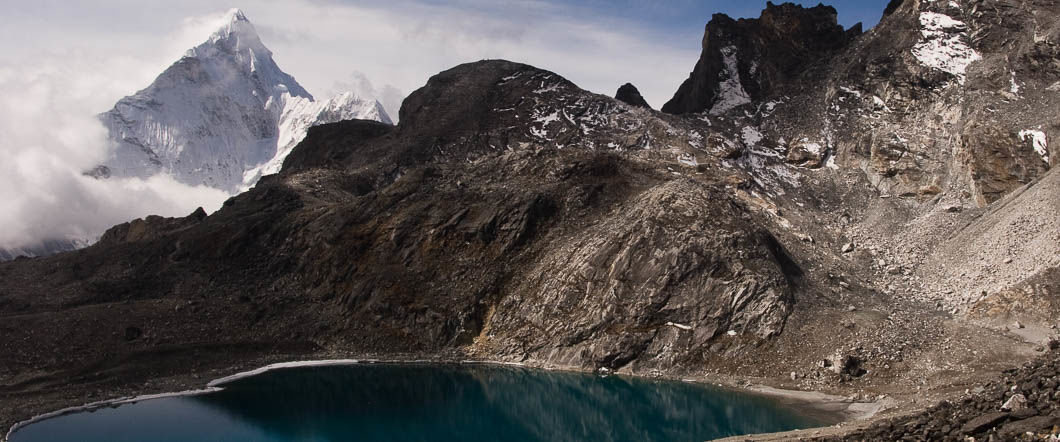
    1. Kongma La (5,535 m / 18,159 ft)

    The climb down from the pass to the other side to Chhukung is half a day and has great photographic opportunities of eroded Khumbu landscape, its snowy peaks, and alpine landscape. As the pass is very high, the trek itself also provides very good photography opportunities of glaciers, saw-tooth ridges, and glacial valleys off the beaten track in the lower and tourist areas of the nation.

    2. Cho La (5,420 meters / 17,782 feet).

    The second of the Three Passes trek, Cho La, is also possibly the most challenging trek physically, as it involves steep slopes, rock faces, and ice plateaus. It is not far from Gokyo and Dzongla, and Cho La serves as a crucial connector between the region of the Everest Base Camp and Gokyo Valley. The route to Cho La is dangerous, especially in spring or winter when the trail can be covered with snow and therefore even more risky to walk on. The way down is also dangerous, with some of it done by ice walking and loose scree handled very carefully.But for those who make it through the Cho La, some of the most breathtaking scenery in the Everest Region awaits.
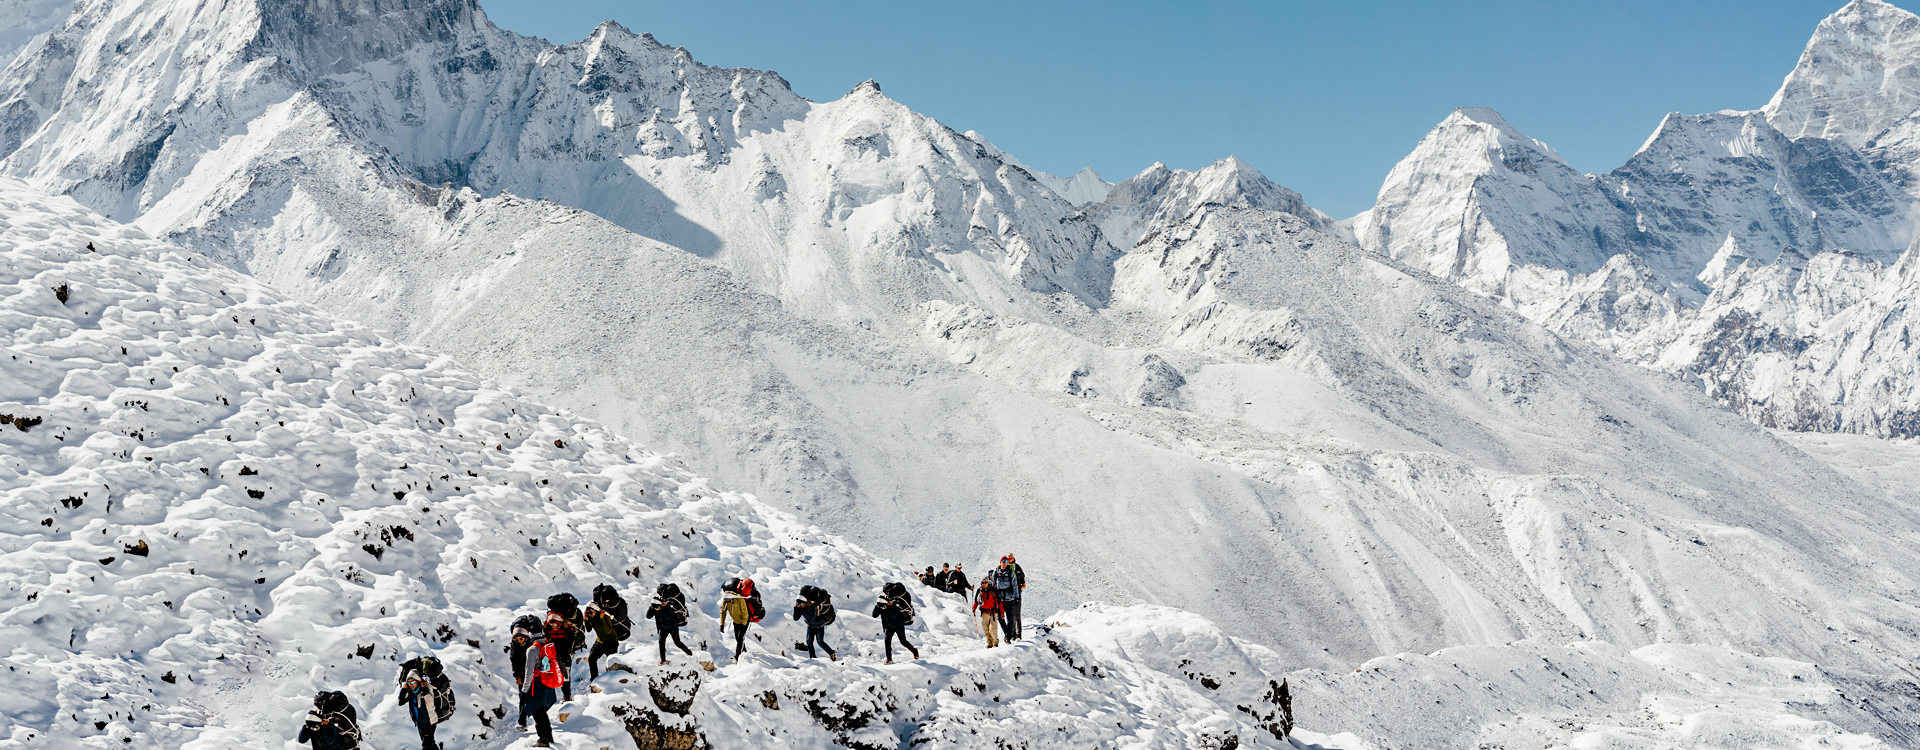
    Cho La (5,420 meters / 17,782 feet).

    Cho La has some very dramatic moments of theatre to be filmed on celluloid. Climbers are transported over the pass on alpine-sized ice, rock face, and lakes, with occasional glimpses of Everest, Lhotse, and other grand ridges in the vicinity. The second half of the day provides an open landscape that is ideal for wider shots, where you can capture not only the summit of the mountain but also an unbroken wilderness view below. Blue-green lakes and the tranquility of the Gokyo Valley are even more awe-inspiring after having struggled to cross the pass. Landscape and isolation of Cho La are two of the most rewarding passes to capture on this whole trek.

    3. Renjo La (5,340m / 17,520ft)

    The last of the last of the Three Passes trek, Renjo La, lies between Thame and Gokyo. The shortest of the three, but perilous in itself by virtue of how high it is and the awful weather. The walk to Renjo La provides stunning panorama shots of Everest, Makalu, Lhotse, and Cho Oyu, and the chance to capture the Gokyo Lakes, which mirror the snow-topped peaks surrounding them. The path to the pass is half rock-studded and steep, but also the least crowded of the three passes, so a less crowded, more personal trekking experience.
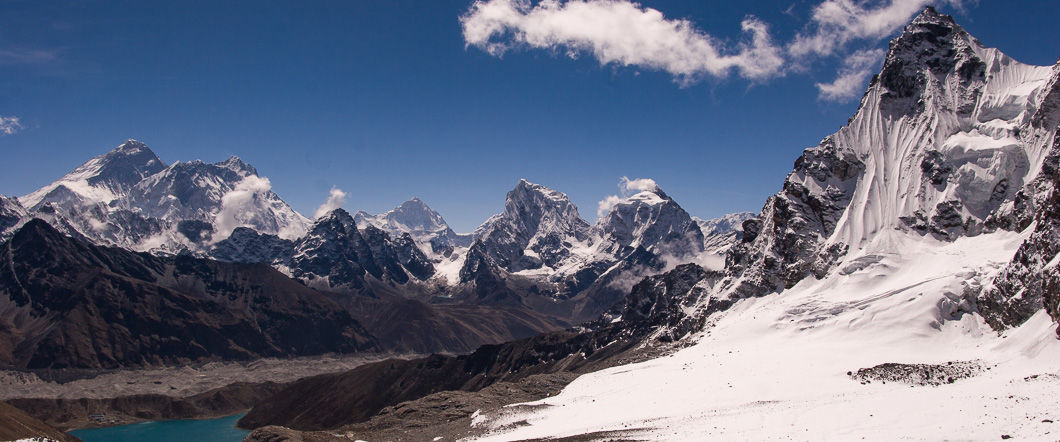
    Renjo La (5,340m / 17,520ft)

    Renjo La contains some of the finest photographs on trek, particularly of Gokyo Valley and Gokyo Lakes. The pass itself offers a great view with a panorama out over the Khumbu countryside. On a good day, you can take a photo of the entire grandeur of Everest and the surrounding peaks from Renjo La, and it is a photographer’s paradise. Renjo La is also beautiful with views of surrounding valleys and hills, and less people conditions than on the more crowded trails near Namche Bazaar and Everest Base Camp. Renjo La is therefore a perfect spot to capture high-altitude landscape shots with fewer trekkers in the scene, which a very coveted by nature and adventure photographers.

    They provide a wonderful impression of each pass, terrain, obstruction, and photo stop it offers.

    Three Passes Trek perfect for Adventure Photography
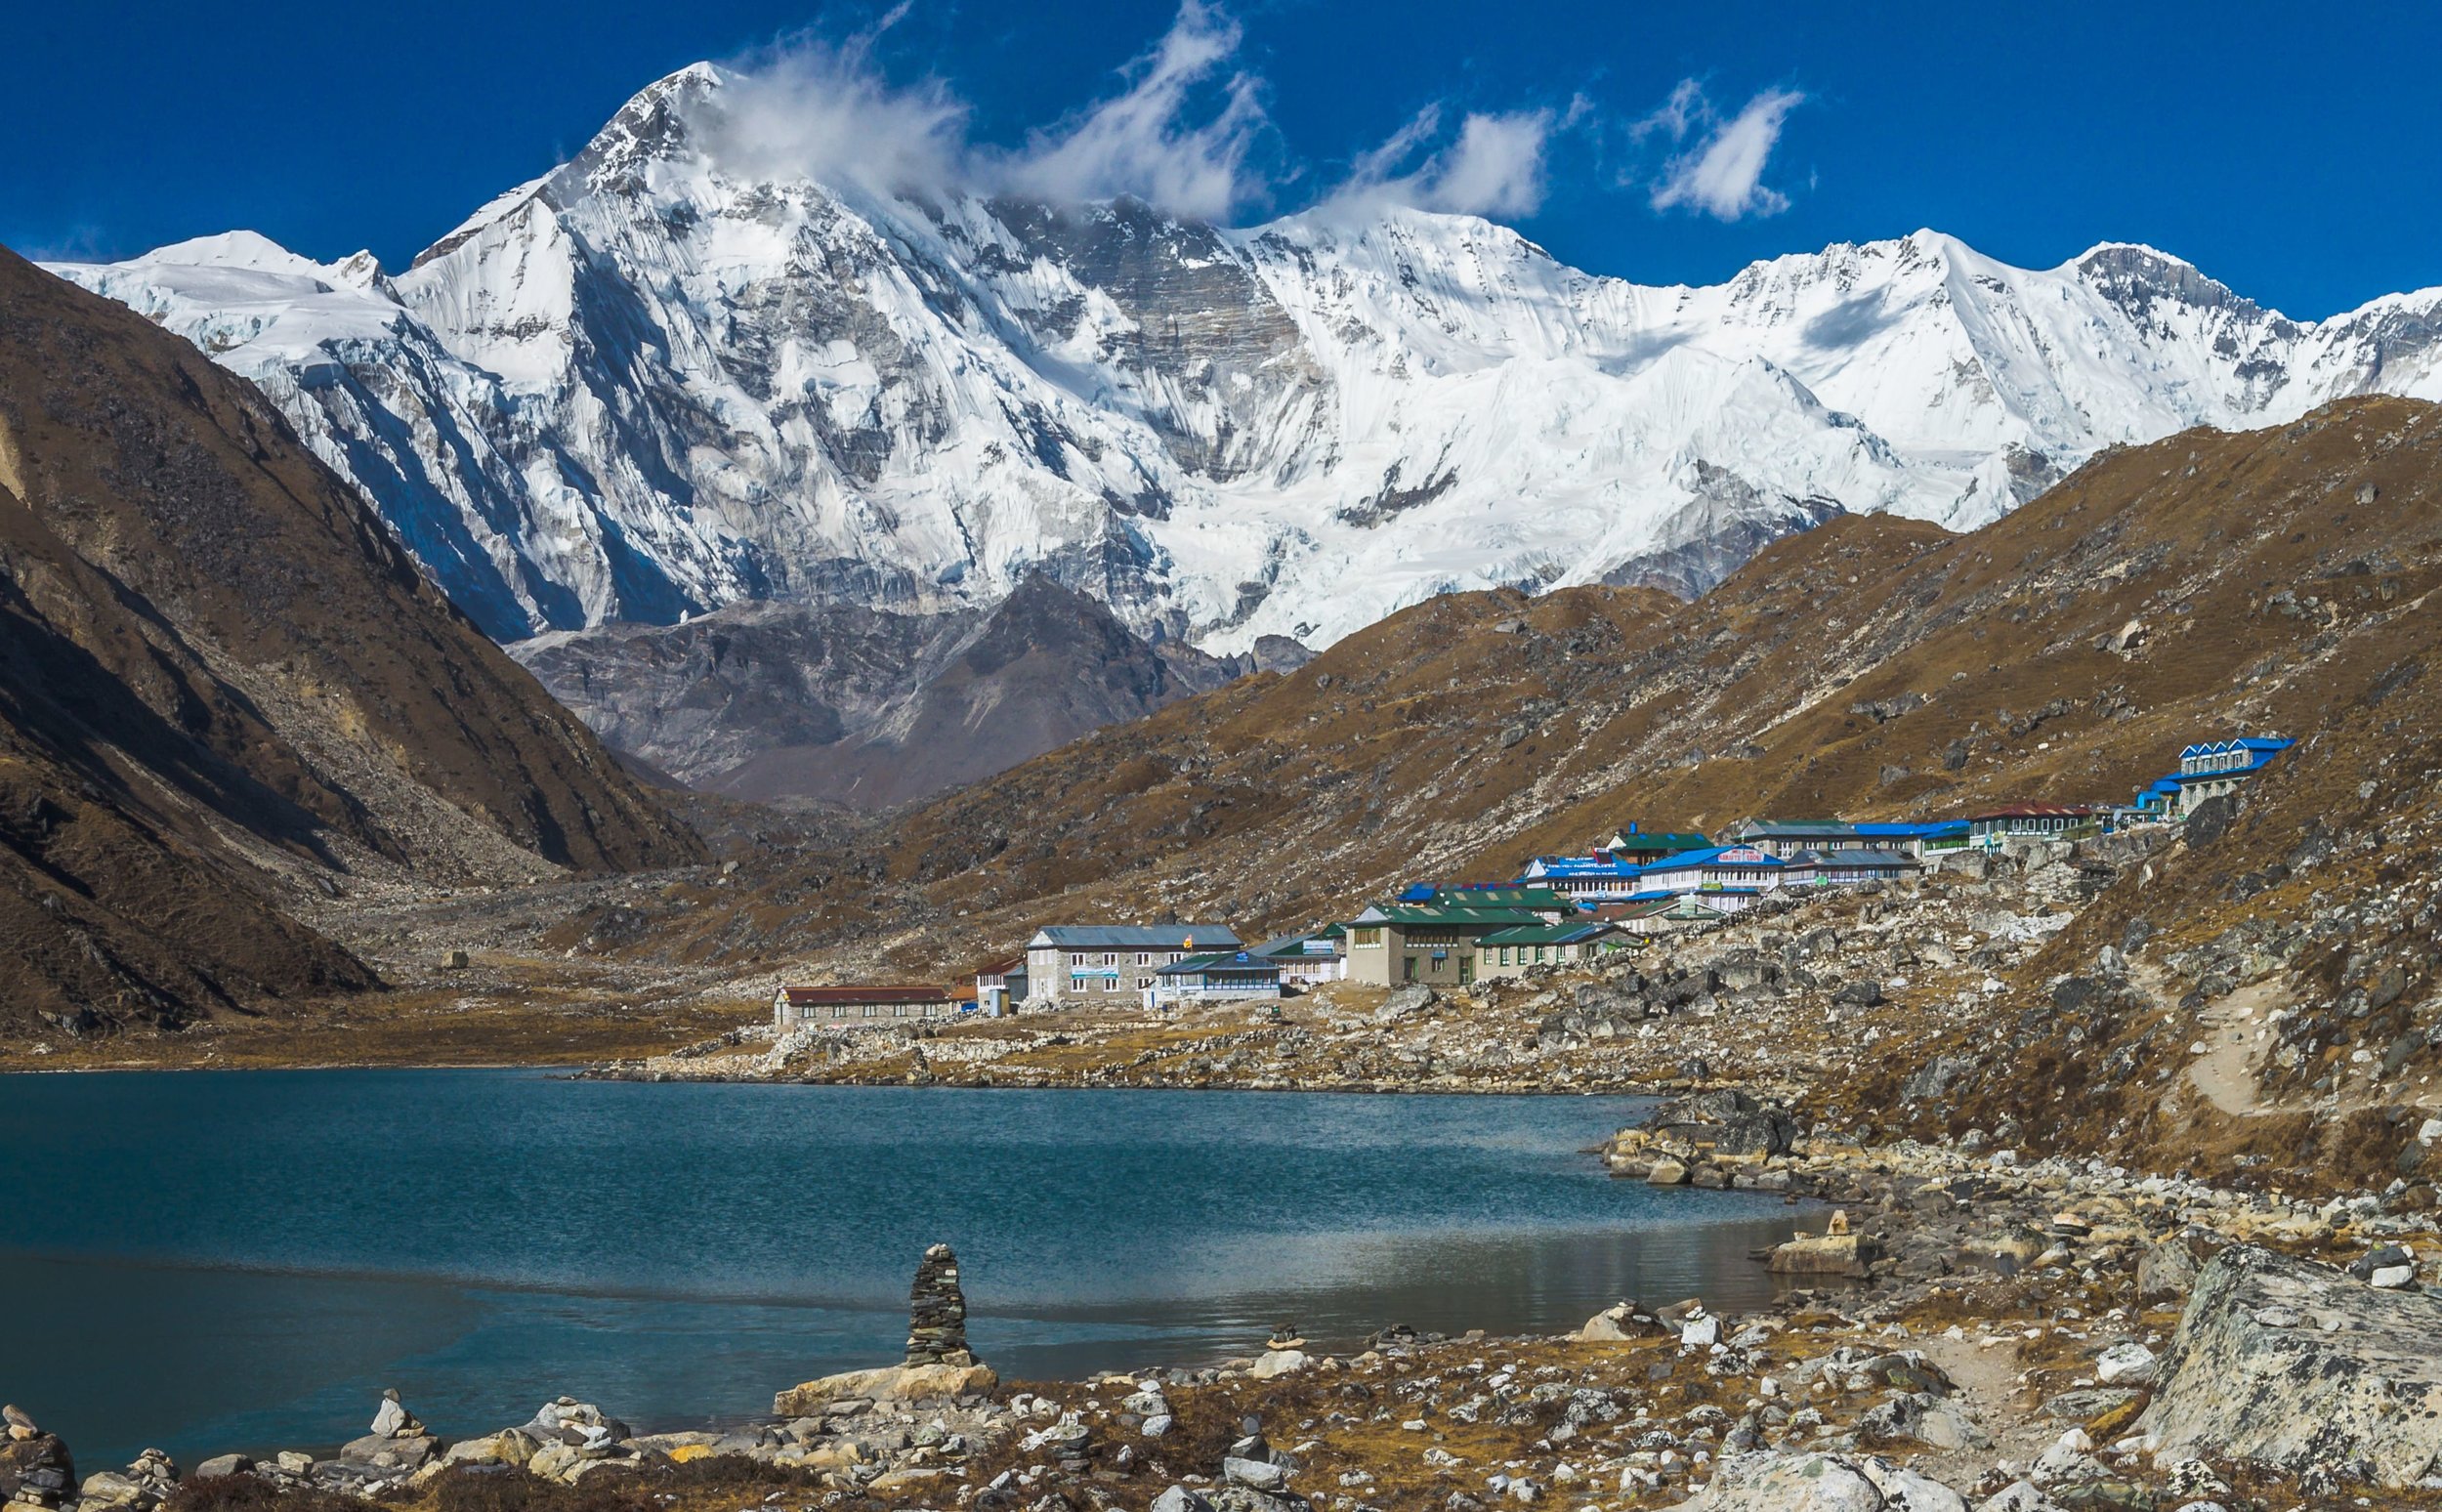
    Three Passes Trek

    1. Breathtaking Mountain Sceneries

    As you go through the passes, you are treated to unparalleled scenery of the world’s highest mountains. Mt Everest, Lhotse, Makalu, and Cho Oyu provide the background for some of the finest landscape photography opportunities in the world. Rock peaks, snow-capped glaciers, valleys, and alpine forests provide you with more than enough subjects to photograph.

    Best Photo Spots: Show Everest’s size, Lhotse’s ominous ridges, and Makalu’s appealing uniqueness from a wealth of diverse perspectives on the hike. Sunrise and sunset on these giants are magnificent in the warm light.

    2. High-Altitude Lakes and Glaciers

    Your walk comes across a series of high-altitude lakes like the Gokyo Lakes reflected by white capped mountains lining them in glittering crystal clear shine. Mirror calm lakes are ideal for pan photography to bracket a reflection shot with sky and even mountains. Ngozumpa Glacier-longest glacier of Khumba valley is another location to try and freeze peaceful nature.
    Best Camera Moments: morning photo of Gokyo Lakes if there won’t be any ripples on the lakes’ water, and reflection of about peaks can’t be evaded. Even the glacier has still another unique job to accomplish, it provides a good view of ice and a good landscape!

    3. Sherpa culture and Villages, something special

    You will be required to trek through remote Sherpa villages like Namche Bazaar, Dingboche, and Lobuche, where you might want to capture Sherpa culture and Sherpa life experiences in your camera. Villages are made up of reddish-brick-colored villages, Buddhist monasteries, and reddish-brick-colored prayer flags, with the appearance of blowing and billowing over hills’ slopes.
    Best photography scenes: Sherpa villagers dressed in their traditional attire, later used prayer wheels, and monks in local monasteries. Rich culture and hostile high-altitude environments: great photogenic dramas.
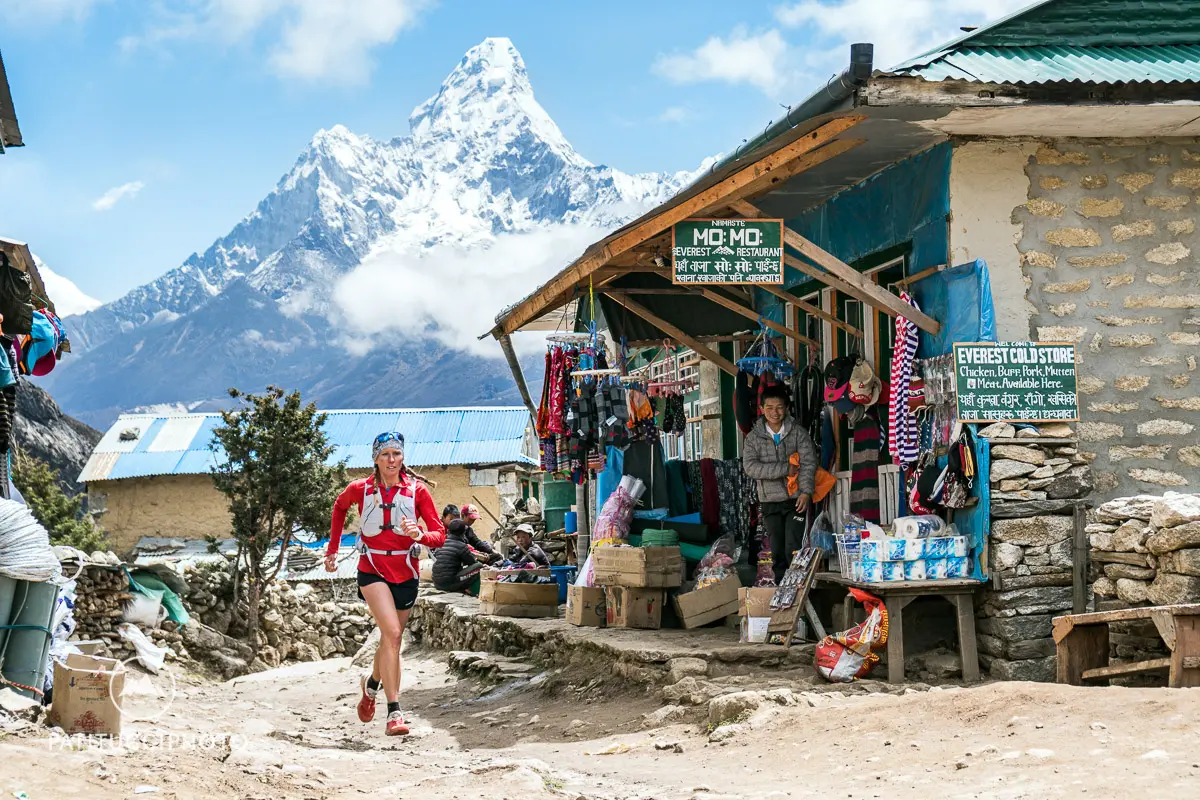
    Three Passes Trek

    4. Challenging and Diverse Terrain

    The Three Passes trek is so varied that there will never be room enough to cover it all. Mountain ridge and climbs, glacial lakes, grassy meadows, rhododendron forest – at every turn on the trek we were constantly discovering new ways of composing a photo! The ice trails/suspension bridge walk just enhances the drama of the photos.

    Best Shots: Position the trekkers in front of such titans, small suspension bridges over giant canyons, and small ridges on a monolith, a ridgeline sequence of mountains.

    5. Flora and Fauna

    Khumbu is also full of Fauna and Flora, such as the Himalayan Tahr species, snow leopard, vultures, pheasants, musk deer, etc. Flora is in large numbers, grazing over the alpine grassland, junipers, and rhododendron bushes, all of which are plentiful, having more than enough wildflowers during spring and filling your picture with more than enough colors.
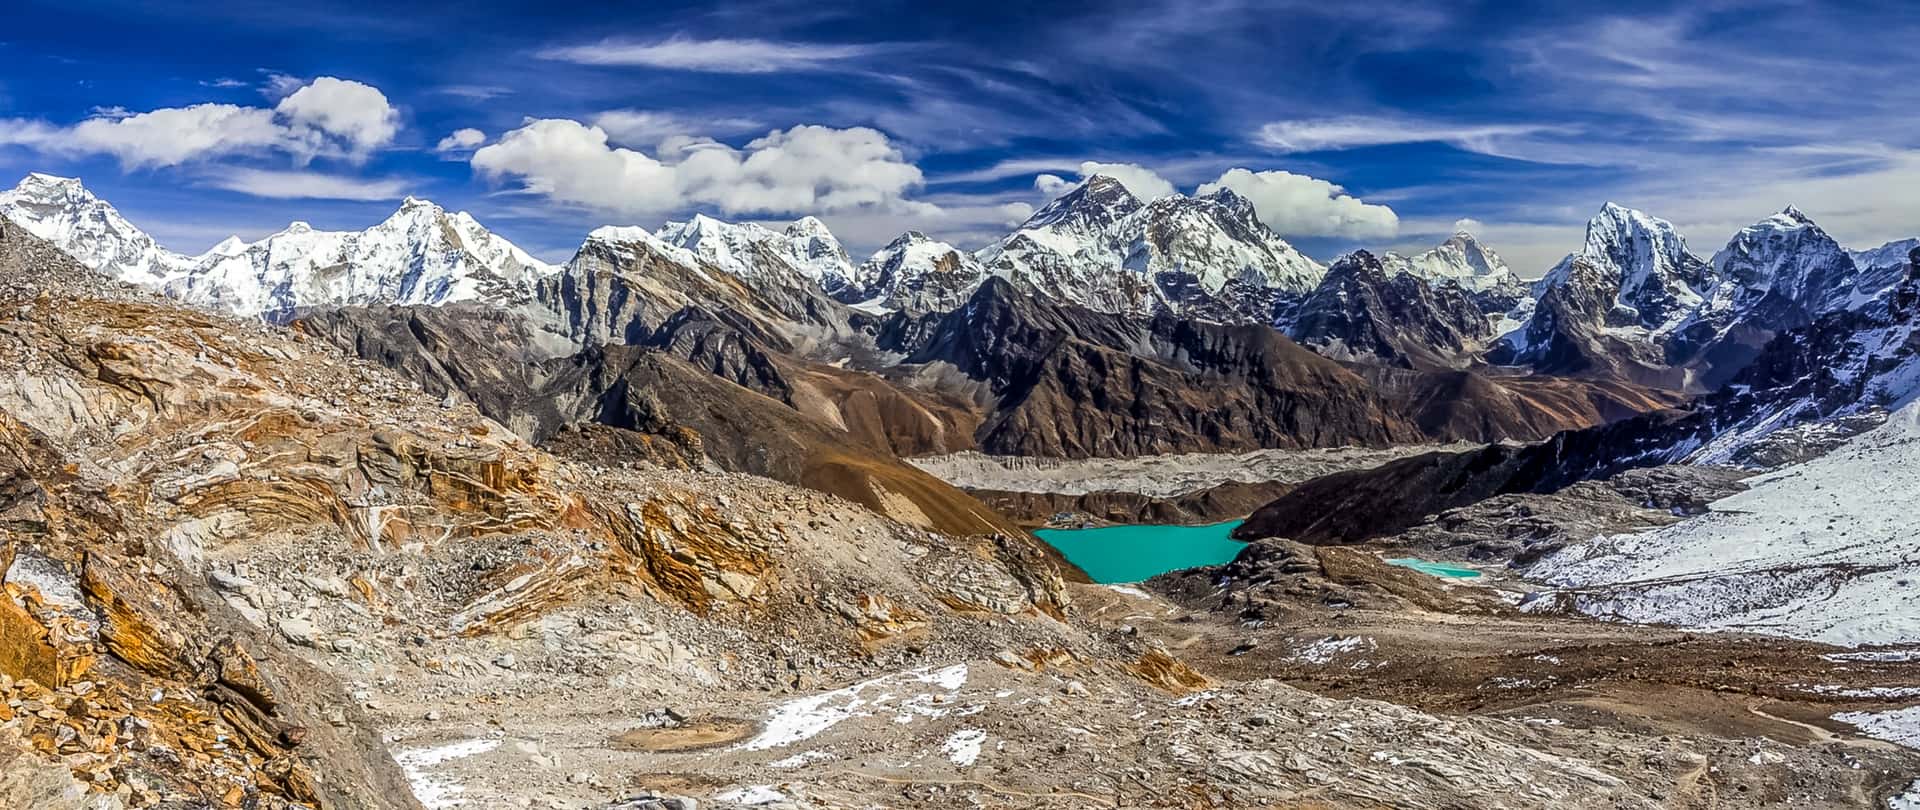
    Three Passes Trek

    Best Time to Visit the Three Passes Trek for Photography

    The most favorable time of the year to visit for the Three Passes trek photoshoot is pre-monsoon (spring) and post-monsoon (autumn):

    Spring (March to May): Weather is ideal to capture the colorful flowers of the region. There are flowers in bloom, and the air is fresh with expansive hill views. Spring is very hot, and the trek is full of trekkers.
    Autumn (September to November): Blue sky and fresh air, great light, and visibility for perfect photography. Fewer rains are also experience during autumn, so it is less probable that your mountain photos will get clouded.

    Equipment for Adventure Trekking Photography of the Three Passes

    You need good equipment in order to capture the grandeur of the Everest landscape. Some of the must-have equipment to carry along is explain below:

    1. Camera Equipment

    • DSLR or Mirrorless Camera: Offers higher quality images and more flexibility per shot type.
    • Wide-Angle Lens (16-35mm or 24-70mm): Excellent for capturing sweeping wide scenes, mountain landscapes, and panos.
    • Telephoto Lens (70-200mm or 100-400mm): Excellent for capturing distant wildlife shots or for flying around distant summits.
    • Tripod: A travel tripod will help in capturing long-exposure shots during dawn and dusk.
    • Extra Batteries and Memory Cards: Cold batteries drain quickly, so carry plenty of spares. Carry as many memory cards as it will take to hold all your photos.
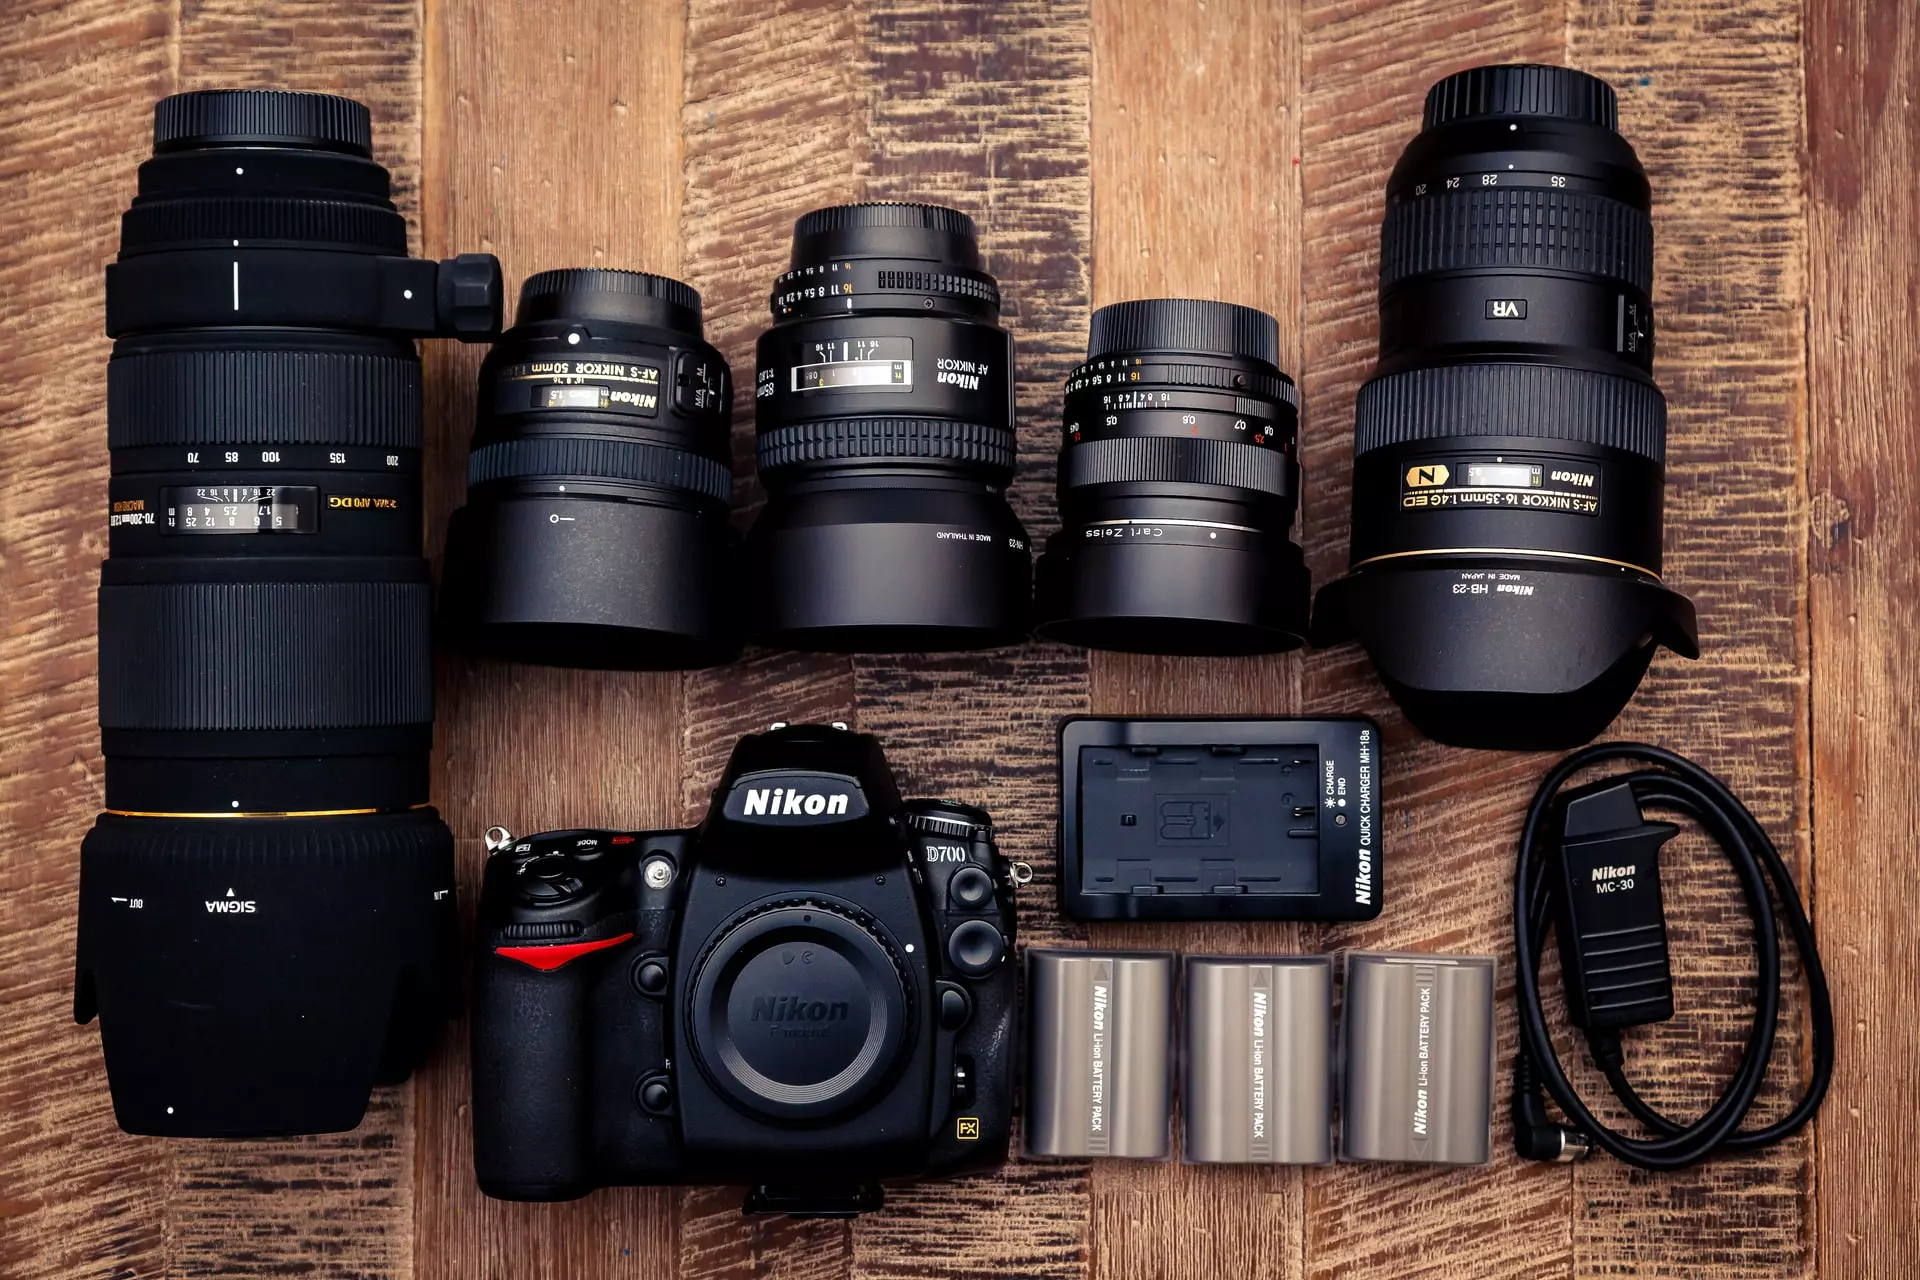
    Camera Equipment

    2. Protective Camera Gear

    Camera Rain Cover: Dry and snow-free glacier hiking or brief snowstorms.
    Lens Cleaning Kit: Dust and moisture accumulate quickly in the Himalayan environment, and so a clean lens equals tack-sharp photography.

    3. Drones (Optional)

    The drone can capture the scenery of great mountains and valleys from a higher altitude, having unobstructed vision of the area. Make sure to take note of what is regulate locally, provided it is about operating drones, and adhere to all of them.

    Photography Tips for the Three Passes Trek

    Three Passes Trek

    Photograph At Golden Hours

    Soft warm light at dawn and sunset—the golden hours—add depth, contrast, and a touch of magic to mountain landscapes. Golden hours in the Everest range give the ideal light to capture white peaks golden and pink against dark dark blue sky. Dawnlight also gives bluer heavens and less haze, ideal to put Everest and his friends in top condition.

    Use a Polarizer Filter

    Polarizing filter is a great piece of equipment for serious photography, particularly when outdoors in snowy or reflective weather like in the Himalayas. Not only does it stop glare on water, snow, and wet rock but improves the color of your landscape photo’s color so that it looks more vivid. Darkens the sky and contrasts the sky so your photos result in lighter and darker in color without needing post-processing.

    Watch the Details.

    Other than panoramas, detail tells your travel story. Tightly cropped rock and ice, whirligig prayer wheels, or snow prints are all details so small, butthey provide variety and credibility to your video. Close-ups are what make the intimacy as well as the respite from the grandeur of wide shots.

    Be Patient and Attentive

    Light in Everestland changes, and your moment-in-time shot is already there waiting to be snap. Clouds will shroud a summit for a brief instant and lift once more; shafts of light will transform an uninteresting second otherwise into that of magic. Having the location provides one with the leeway to wait and react to the moments that exist briefly to allow one to present them as spontaneous and real.

    Be Respectful of Local Culture

    Local people and the people of the Everest region must be respect and photographed politely. First, permission must be ask before photographing a person, and, by all means, must not go inside anyone’s home or religious places. Sherpa culture is respectful and polite, and being respectful is a guaranteed method of gaining trust and authenticity in images.
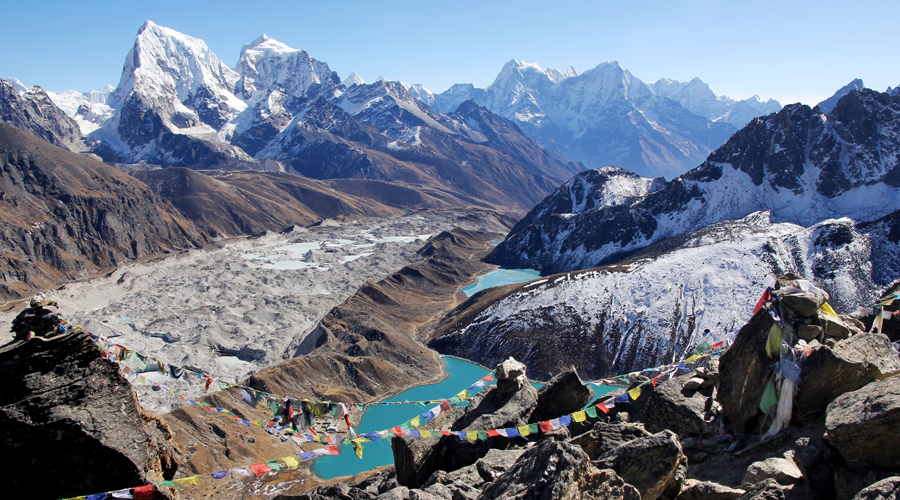
    Three Passes Trek

    Conclusion

    The Three Passes trek not only requires a lot from the trekkers, but also is heaven for adventure photographers. Its highest points at high altitudes, its high-altitude lake, its Sherpa village, and the diversity of landscapes transform the Everest region into a treasure house full of endless possibilities for photographers to have the best. And if you visited there at its right time of year, bag in hand and gear, and if you sat patiently out waiting for some good photographs, then you would have been able to imagine its magnificence and beauty.

    Take your kit bag, fill your camera, and go capture some photos of the most beautiful landscapes of the world! Contact us today at Happy Mountain Nepal, on Facebook, Instagram, or TikTok

  • Everest Base Camp Trek: Lifetime Experience

    Everest Base Camp Trek: Lifetime Experience

    Everest Base Camp Trek: Lifetime Experience

    Everest Base Camp Trek is a once-in-a-lifetime spiritual, physical, life, and cultural quantum leap. EBC is 5,364 meters (17,598 ft) high and is located around the highest mass on earth, Mount Everest (8,848.86 m / 29,031.7 ft). With each step, you are closer to trekking on top of mythological mountain ranges, century-old monasteries, hundred-year-old Sherpa villages, and a soul-trek experience that you cannot wipe away from your memory.

    everest base camp

    Why Everest Base Camp Trek Is a Lifetime Experience

    1. Get close to Mount Everest

    Being at EBC is being and standing in the shadow of the world’s highest- a position where you can only dare to have the audacity to assert and check off your bucket list, together with all the other adventure-seeking travelers from across the globe. You’re not on Everest, but where the Everest giants of Mount Everest are, like sunrises on the great ridges, is heavenly. Walking the EBC trail by yourself takes you, by legend, as close as it gets to the Mount Everest summit view and mythic Kala Patthar (5,545 meters), quite possibly the best view of Everest you’ll ever have the good fortune to witness.

    2. Sherpa Culture and Spiritual Immersion

    You’ll meet Sherpa villagers of the Khumbu: tough Himalayan folk with highly developed mountaineering prowess, boundless hospitality, and first-rate survival skills. You’ll trek through the villages of Namche Bazaar, the villages of Tengboche, and the villages of Pheriche, all with their multicolored prayer flags flapping in the breeze, all scattered with found along the trails like spinning prayer wheels, all topped on ridges with stupas.

    At Tengboche Monastery (3,867 m), you will pray with chanting monks within sacred walls, and dark Ama Dablam and the other great white giants – a spiritual experience in the true spirit of your trek.

    3. Varied and Breathtaking Landscapes

    We trek through varied Himalayan scenery:

    • Rhododendron and pine forest hide Lukla and Phakding villages,
    • Suspension bridges spanning high above glacier-fed rivers,
    • Yaks and alpine grasslands at Dingboche and Lobuche,
    • Rock moraines and snow ridges on the way to Gorak Shep and EBC.

    Every bend in the trail, a new panorama, a new peak, another rest stop, and just soak it all up.

    4. A True Physical and Mental Challenge

    It’s not a holiday- it’s a test. You’ll be trekking 5-7 hours every day, trekking all day, a nd cold and tired all day. But it is in the challenge that we get tough. To even get to Base Camp is such a great feeling and sense of achievement. It’s a test of your endurance, your determination, and your sense of accomplishment.

    Everest Base Camp trek route

    Day 1: Fly to Lukla and Trek to Phakding

    It starts with a pounding mountain flight to Lukla, a small cliff airport that is perched at a height of 2,840 meters. It’s a 30-40-minute roller coaster ride, and you don’t even get the sensation that you’re flying over the Himalayas. The trek starts here, and you walk from the pine forest and small Sherpa villages step by step. You further trek to Phakding at an altitude of 2,610 meters. You see many stone chortens, stupas, and prayer flags waving in the wind along the path.

    Day 2: Namche Bazaar to Phakding

    A different evening sees you once again on the trail side of the banks of Dudh Kosi.
    You trek on suspension bridges, mega suspension bridges, such as some of the following: the Hillary Suspension Bridge, which has the questionable honor of having had a string of accidents, including a helicopter crash landing.

    You enter the Sagarmatha National Park at Monjo, where they check your trekking permit. The path climbs but it’s the final two hours of tough and steep walking to the wealthy Sherpa town, Namche Bazaar, at 3,440m. If the day is clear, you get your first view of Mount Everest. There are shops, bakeries, equipment stores, and mountain views to be had at Namche.

    Day 3: Acclimatization Day at Namche Bazaar

    To avoid high altitude sickness, you will take an entire day’s rest in Namche.
    Not idling about, but a quick walk around so that your body is conditioned and taking the most scenic trek to Everest View Hotel (3,880 meters) with sunrise over Everest, Lhotse and Ama Dablam, or the walk to Khunde and Khumjung village home of the Hillary School and monastery which contains a Yeti scalp preserved.

    You can stroll around the Namche evening bazaars, visit the Sherpa museum, or just sit and have tea and look across the valley.

    Day 4: Trek Tengboche to Namche Bazaar.

    The mountain trail starts after departing Namche because from here, one has a good view of Everest, Nuptse, and beautiful Ama Dablam.

    This is a tuning pair of hours of valley and mountain, then steeply downwards to the Dudh Kosi River and upwards again sharply through pine and rhododendron forest to Tengboche (3,867 meters).
    This quaint, spiritual village contains the famous Tengboche Monastery, the biggest monastery in the Khumbu valley.

    It lies on massive slopes, a sacred and serene place where you become a part of a prayer ceremony and achieve some peace of mind.

    Day 5: Tengboche to Dingboche trek

    Descend from Tengboche along the forest to Debuche and further down to Imja Khola on a rickety bridge and then to Pangboche, which is the highest permanent settlement in the area. Further, a more Alpine and open country with wider valleys towards Dingboche (4,410m), a windy town with white tops of mountains in the distance. And Dingboche is fine too, “post summer valley,” and it’s beautiful, and a pleasant rest to acclimatize.

    Day 6: Acclimatization Day at Dingboche

    Having a day of full acclimatization allows your body time to adapt to the altitude.

    Most trekkers visit Nagarjun Hill (5,100m), an exhausting but well worth the climb with really stunning views of Makalu, Island Peak, and the valleys below. An alternate is a side trip to Chhukung and glacier sightseeing, and a climbing path. Dingboche is a pleasant spot, few sun-dried teahouses and ga good location between the massive peaks of Ama Dablam and Lhotse. Dingboche is a relief.

    Day 7: Lobuche trek from Dingboche

    You will gradual ascent up the Imja Valley. The rocky path continues upwards, ascending, ascending through dry but breathtaking alpine desert. When we traverse over to the other side of Dughla (Thukla), the path steepens even more, and we will be along the ridge with memorials to the climbers who didn’t return from Mt. Everest. The squalor of this path is made worthwhile by the sight. We ascend the rocky path to Lobuche (4,940 meters), a small glacial town at the foot of giants Nuptse and Pumori.

    Day 8: Gorak Shep to Everest Base Camp

    The last day will likely be the most exciting day of the trek.

    Take a brief hike to Gorak Shep (5,164m), the final village on your trek to Base Camp, and abandon your loads in order to hike upstream along the lateral moraine of the Khumbu Glacier.

    The path is rocky and slippery with boulders and snow to overcome. A grinding willpower will finally reward Everest Base Camp (5,364 meters), an unearthly emotional peak. The base camp is encircled by prayer flags, tents (during season), and the huge Khumbu Icefall. Stop and take in the view for a while, then go down again to Gorak Shep for the night.

    Day 9: Ascending Kala Patthar and back to Pheriche.

    Early morning ascent to the summit of Kala Patthar (5,545 meters) for sunrise. The summit offers the best and unobstructed view of Everest, Lhotse, Nuptse, and Pumori. Golden early morning sunbeams on the high mountains are breathtaking. Then to Gorak Shep for breakfast and begin a return journey, a trek down to Pheriche (4,280 meters). Heaven is a lower elevation, and the trek is not so draining, even with tired legs.

    Day 10: Trek from Pheriche to Namche Bazaar

    The hike continues to Pangboche and Tengboche village, which are very welcoming ones, but now you’re moving in the opposite direction to them, so you have an added bonus to view them on the other side. You continue your walk through the woodlands and streams and view the Himalayan flora and fauna. You take an easy hour-and-a-half-long walk or walk-and-a-half and indulge yourself at the Namche Bazaar, where you pamper yourself with a hot shower as well as a steaming cup of coffee.

    Day 11: Lukla, downhill trek from Namche Bazaar

    The knee-jolting downhill trek on the last day from Namche to Lukla through Monjo and Phakding needs downhill and long-distance tires. Party time at Lukla. Rather than turning it into a party time, trekkers celebrate their trek by enjoying the farewell traditional dinner with guides and porters, food and local drink, and spreading smiles and laughter.

    Day 12: Flight on the way back from Lukla to Kathmandu.

    You return on the last day on a morning flight from Pokhara to Kathmandu. The return flight, also, is picturesque with birds’ eye views of the trek trail behind you. You’re free the rest of the day to relax, reflect, or bask in the hospitality and coffee culture of city life in the capital. The trek is over, er but memories linger.

    When to Trek to Everest Base Camp?

    Spring (March – May)-: Ideal time of the year for reliable weather, clear sunshine, blooming rhododendrons, and a crystal-clear view of the high mountains.

    Autumn (September – November) -: Blue sky after monsoon, and dry trails with spectacular views.

    Winter (December – February)-: Near-white snowy trails, and below-zero temperature. Only for the experienced trekkers, who are not shy to trek alone.

    Fitness and Training

    Here it is, a step by step run through of the fitness training guide for the Everest Base Camp Trek, suitable for beginner and intermediate trekkers.

    Train Minimum 2 – 3 Months Prior

    1. Begin training at least 8 – 12 weeks.

    Pre-trek. If you are not fit, there is a good chance that you will need to start earlier. The aim is to build and bank endurance and strength, topped up in growing quantities. By establishing a routine and consistent exercise regimen, you will physically condition your body for stresses and reduce injury on the trek.

    2. Cardio

    No matter what cardio you perform, it will strengthen your heart and lungs so that your body will be better at using oxygen, which at high altitude is a major factor.

    • Running builds legs and leg muscles.
    • Cycling is low-impact but great for endurance.
    • Swimming builds lung capacity and is non-impact.

    Do 3–4 times a week and build up time and intensity as your fitness level builds. Attempt to do it in steady-state cardio but also attempt to fit in some hill repeats if possible.

    3. Heavy Pack Backpacking

    This is not merely walking on the treadmill with a heavy pack! Your hips, back, and shoulders will adapt to bear the load for hours: 5–10 kg.

    Practice wearing a pack, or with water packed in. Add weight and duration walking gradually. Practice uphill and downhill walking, such as on actual walking trails.

    4. Leg and Core Strengthening Exercises

    You’ll be ascending steep rocky paths when you hike. Your legs must be conditioned. Squats, lunges, step-ups, and calf raises will all condition climbing muscles up and down.

    You require a strong core (lower back, abs, glutes, obliques) to assist in supporting your posture and balance while backpacking. Do planks, bridges, and twists 2-3 times a week.

    This will not only prepare your upper body to bear your pack but also ease the pressure off your back and give stability when walking on rocky ground

    Permits Required

    1. Sagarmatha National Park Entrance Permit

    Cost: NPR 3,000 (foreigners), NPR 1,500 (SAARC nationals)

    2. Khumbu Pasang Lhamu Rural Municipality Permit

    Cost: NPR 2,000 (all nationalities)

    Packing List

    Packing item for trek

    1. Clothing:

    • Moisture-wicking base layers
    • Fleece and insulated jacket
    • Waterproof shell jacket and trousers
    • Warm hat, gloves, buff/scarf
    • Thermal socks and high-quality hiking boots

    2. Gear:

    • Backpack (50–65L)
    • Sleeping bag (-10°C or warmer)
    • Headlamp and spare batteries
    • Trekking poles
    • Sunglasses (UV)
    • Water bottles/hydration system
    • Water purification tablets

    3. Miscellaneous:

    • Sunscreen, lip balm
    • First aid kit
    • Snacks and energy bars
    • Power bank
    • Travel insurance at high altitudes

    Cost Breakdown (Mid-Range Estimate)

    1. Flights (Lukla–Kathmandu) $300-$400

    The largest part of the cost of Everest Base Camp trek logistics is the flight from Lukla to Kathmandu. It’s a short but essential flight because Lukla is where the Everest region access begins. Return airfare will be $300 to $400. Flights also change with the season with higher months to trek, October and November being peak seasons. Flight duration is approximately 30 minutes but depends on weather and therefore can be delayed or even canceled. Since it’s a long flight and possibilities of interruptions are extremely high, it is better to stay an extra day in Kathmandu in case of a delay.

    2. Permits $50–$60

    You will require a series of permits to trek in the Everest region, which are obligatory.

    They are two of the bigger ones, and they are Sagarmatha National Park Permit and TIMS card. They are the guarantee of monitored and secure access to trekking paths. The Sagarmatha National Park Permit is around $30, and the TIMS card is around $10 to $20. The two passes total around $50 to $60. These passes can be readily purchased before the trek in Kathmandu, or at the first settlements along the trail. It’s just part of having had your trek arranged and being regulation-friendly required.

    3. Guide and Porter $300–$500

    Although not obligatory, most visitors find it well worth the expense to have a guide and/or porter to help make the trekking experience all the more worth the while.

    A guide costs $20-$30 a day and a porter costs $10-$20 a day, agency and season based. Guide and porter for 12–14-day trek will cost $300-$500. A guide who knows the trail, knows the culture, and is sensitive to altitude is worth every penny. Porter service will pack up your bags, removing some of the physical effort of the hike from your shoulders, especially where there is climbing or descending to reach it. These services are typically well worth the extra convenience and security.

    Everest Base Camp Trek

    4. Accommodation (12–14 days) $150–$250

    The accommodation on Everest Base Camp trek is usually in teahouses and the rooms are plain but clean. The accommodation for a 12–14 day trek is usually between $150 and $250. It is lower towards the lower section of the trek and the higher you ascend where accommodations are scarce. The rooms in teahouses are plain but with shared toilets and hot and dry. Additional privacy is provided by en-suite bathroom rooms at additional cost. The same accommodation in Kathmandu is the same price, but if you would like more comfort at the start and end of the trekking, more costly accommodation is possible.

    5. Food and Drink $200–$300

    Trail food and drinks are also a considerable cost. You will be consuming at least three meals—dinner, lunch, and breakfast—and snacks and drinks to get you through on the trail. Lower-grade trail food costs $5–$7 a meal, but the higher up you climb, the more expensive it is since there is a logistical problem with food transport up to higher elevation. 12–14 days’ worth of food and fluids costs $200–$300.

    Oatmeal or bread makes up most of breakfast, and lunch and dinner consist mostly of local food such as dal bhat, noodle, or momo. Tea, bottled water, and snacks are expensive, especially having to eat at higher elevations.

    6. Miscellaneous (Wi-Fi, Showers) $50–$100

    Aside from the outrageous trekking fee, there are a couple others you will be paying along the way on the trek. They do have Wi-Fi in a few of the teahouses, but it’s extremely slow and it will be $2 to $5 per hour. Even a shower that’s hot will cost you money and will typically cost you $2 to $5 per shower.

    All of these will be costly on the way while trekking and will usually cost you $50 to $100. Other trekkers also purchase other foodstuffs, drinks, or souvenirs on the way while trekking, so it is always better to carry some money with you. The need for these little luxuries is one of the reasons why the total cost of the trekking but can be what will make it worthwhile.

    Conclusion

    The Everest Base Camp Trek is not just about the destination—it’s about the transformation along the way. It’s about pushing your limits, connecting with the mountains, and immersing yourself in one of the world’s most spiritually rich and naturally stunning landscapes.

    Whether you’re seeking a personal milestone, a cultural journey, or the adventure of a lifetime, the Everest Base Camp Trek delivers an experience that lingers in your soul forever. Contact us today at Happy Mountain Nepal, on Facebook, Instagram, or TikTok.


  • Everest Base Camp Trek – Trail and Distance Overview

    Everest Base Camp Trek – Trail and Distance Overview

    Everest Base Camp Trek – Trail and Distance Overview

    Everest Base Camp trek, World Famous Trek. Trekking to Everest Base Camp — the most famous adventure is giving you the opportunity to stay insider the Khumbu region of Nepal at the feet of to world’s top-highest mountain peak Mount Everest. Part of the bucket-list for adventure-seekers and activity-seekers, outdoor lovers, social enthusiasts, in-fenced nature lovers, culture and croft glory. What not to expect on Everest region trek feel the trek might be the best perfect percentage. The ideal percentage of flawless trek planning This trek base camp is every trekkers dream trek and all the trekker will desire to plan everything according to needs, so read this blog to know about everything about Everest Base Camp trek distance, what you can expect in a day mile, trekking stages and some tips to plan Everest Base Camp trek.

    everest base camp

    The Everest Base Camp Trek in Short

    The Everest Base Camp trek is a 130 kilometers (80 miles) round trip from Lukla and passes Sherpa villages, dense jungle, suspension bridges, monasteries and ice walls. Depending on how quick you adapt as well as your acclimatization routine, completing the trek will take anything from 12-14 days. You ascend slowly so your body can acclimatize to the increasing altitudes consistently, so it’s physical labor but a really rewarding experience.

    The hike is designed to take you as close to Everest Base Camp (EBC) as you can get to — at 5,364 meters (17,598 ft). From the base camp, you see Mount Everest, Lhotse, Nuptse and other surrounding hills surrounded in 360 degree views. You also get to experience a dose of Sherpa culture because the hike winds through Sherpa monasteries and villages such as Tengboche Monastery.

    Practical Tips for Base Camp Life

    Everest Base Camp Trek is one of the most exciting but also, the most strenuous trek of the world However, with proper planning and preparation, it is not only just the reality which it is, but triumph! Some things to note:

    1. Physical Preparations

    • Cardio & Endurance Exercise: Heavy object running, cycling and climbing prepares you to react.
    • Strength-training: (Shoulders, core and legs are strength-trained and so capable of enduring long rises and falls.

    2. Permits & Documents

    • Sagarmatha National Park entry permit (pick up in Kathmandu)
    • Khumbu Pasang Lhamu Rural Municipality Permit (to be obtained in Lukla or in Kathmandu)
    • You will need a TIMS Card.
    • Copy passport and permits.

    3. Best Time to Trek

    • Spring (March-May): Weather turns stable and view clears up.
    • AUTUMN (SEPTEMBER–NOVEMBER): Good visibility, good weather, dry trails
    • Avoid traveling in rains (June-August) as there are some chances of landslide; and not in winters (Dec-Feb) as they get freeze.

    4. What to be careful of:

    • Headache, nausea, giddiness and breathlessness.
    • Carry Diamox (Acetazolamide) (On the advise of doctor)
    • Drink minimum 3–4 litres of water per day.

    5. Packing Essentials

    • Clothing: The doozy — begin with moisture-wicking base layers, add some insulated mid-layers, then top with waterproof outer layers.
    • Shoes: Stiff, waterproof walking boots.
    • Sleeping bag (-10°C to -20°C)
    • Hiking pole (takes weight off knees)
    • Sunscreen and ultraviolet protective sun lenses
    • Headlamp with spare batteries
    • Lightweight pack (rain cover is optional)
    • Emergency Supplies: First-aid center (with altitude sickness treatment)—water purification tablets

    6. Food and Water Safety

    • Do not dehydrate with alcohol and caffeine.
    • Only purification tablets Watershed. bottle filter make.

    7. Budgeting & Expenditure

    • Costs $35–50 per day (it gets more expensive at higher altitude)
    •  No ATMs after Namche Bazaar. Bring a lot of Nepali Rupees.
    • So extra: Wi-Fi, battery charging, hot shower and snacks are highly costly at altitude.

    8. Guide or Porter Hire

    • Guides: $25–35 per person per day; assistance with navigation, permits and safety.
    • Porters — $20-$30 per day; weight limit of 15-20 kg
    • Solo Trekking : Allowed but best with a Guide

    9. Emergency Situations

    • You have acclimatization on data till October 2023 Helicopter Rescue: Rescue Policy has to be run at 6000m
    • Health Posts: Namche, Pheriche & Dingboche (altitude sickness adequate)
    • Communication: Local SIM Card (NCELL) for communication (outside of Kathmandu) Everest Link Wi-Fi in teahouses.

    However, we found out that if you do your homework before you go, the Everest Base Camp trekking adventure is a physical and mental challenge, and then it transforms your life! Go ahead and expend your acclimatization, hydration, and shielding and enjoy that heavenly Himalayan perspective in the middle!

    everest base camp

    Trail and Distance Overview

    Day 1: Lukla to Kathmandu (Everest Base Camp trek:2860m/9383ft), Phakding (Everest Base Camp trek:2610m/8563ft)

    This trek starts with a breathtaking flight from Kathmandu to Lukla, which is famous for being one of the shortest and most challenging runways in the world. The flight itself is also an exciting experience because it offers beautiful views of the Himalayas, especially when you are about to start your adventure.

    You trek from Lukla to Phakding, About 3-4 hours, 8km (5 miles). The trail is mainly descending and passes through small villages and areas full of pine and rhododendron trees. The trail follows the Dudh Kosi River and you will have to cross several suspension bridges; one of the most famous bridges on the trek is

    Day 2: Phakding to Namche Bazaar (3,440 meters / 11,286 feet)

    On day two, you will trek to Namche Bazaar, the gateway to the Khumbu region. It is one of the most famous and most significant stops on the Everest Base Camp Trek. The trek usually takes 6 to 7 hours and covers about 10 km (6 miles) to reach Pengbochen.

    The gradient is more gradual than the previous day’s walk and the route passes through forests, waterfalls and small villages. The steep ascent just before arriving at Namche Bazaar is one of the most notable sections of the trail – a Sherpa town, famous for its vibrant markets, lodges, and beautiful views of Everest and other surrounding peaks.

    Day 3: Acclimatization Day at Namche Bazaar

    It is a steep ascent so proper acclimatization is needed to avoid altitude sickness. You will overnight at Namche Bazaar on the third day to acclimatize so that you can acclimatize to the height and also spend some time thereabouts. Have fun trekking to the Everest View Hotel to have a panaromic view of Everest, Lhotse and other surrounding peaks.

    It is an upward incline throughout and will be 2-3 hours’ climbing where you will be rewarded with some great panoramic vistas of the remaining peaks. Today is a good day for your body to adjust to the entire elevation.

    Day 4: Namche Bazaar to Tengboche (3,860 meters / 12,664 feet)

    You will start on the fourth day towards Tengboche village, which consists of one of the most renowned monasteries in the Khumbu valley, Tengboche Monastery. It would be 5–6 hours by 10 kilometers (6 miles) of walking.

    Everest, Lhotse and Ama Dablam can be seen beautifully from the trek. You’ll be trekking through alpine forests, and across a couple of suspension bridges. You’ll be trekking through small Sherpa villages as well. As you ascend near Tengboche, the nice view of its monastery, covered with the altitude of 3,860 meters, hypnotizes you with itself. The Tengboche Monastery is a spiritual source for Sherpas and contains very peaceful environment and good scenery.

    Day 5: Tengboche to Dingboche (4,410 meters / 14,468 feet)

    It is about 5-6 hours hike from Tengboche to Dingboche, i.e., 11 km (7 mi). At higher altitudes in the mountains the landscape is bare and rockier.

    You will be hiking through tiny villages such as Pangboche, where you can stop to view ancient monasteries, before climbing up to Dingboche. Climbing is difficult reaching higher altitudes, but it is worth your trouble with a view of Everest, Lhotse, and Ama Dablam.

    Day 6: Acclimatization Day at Dingboche

    We spend our second acclimatization day at Dingboche. Peaceful and serene village perfect for rest and acclimatization. Trek short distances to nearby Nangkar Tshang Peak (5,000 meters / 16,404 feet) for close-up views of surrounding peaks today.

    Just like the previous acclimatization day, getting this phase right is well worth the effort to avoid altitude sickness and to let your body acclimatize before undertaking the route through.

    Day 7: Dingboche to Lobuche (4,940 meters / 16,210 feet)

    You will trek from Dingboche to Lobuche, around 8 kilometers (5 miles). It takes 5-6 hours of trekking, and the higher you trek, the rockier and drier the ground around you gets.

    You notice memorials for climbers who have perished climbing along the trail, such as the famous Everest Memorial, to honor climbers who have perished attempting to climb to the summit of Everest. Lobuche is a small resting village along the Everest Base Camp trail.

    Day 8: Lobuche to Gorak Shep (5,170 meters / 16,961 feet)

    From Lobuche, trek to Gorak Shep, a village and the last destination before Everest Base Camp. The trek is 3-4 hours and 4-5km (2.5-3 miles) long. The trail is near the lateral moraine of the Khumbu Glacier and there are good views of the surrounding mountains.

    Gorak Shep is at high altitude, and you would like to rest and drink water as soon as you get there because altitude will tire you out. All the trekkers camp at Gorak Shep and head to Everest Base Camp the next day.

    Day 9: Gorak Shep to Everest Base Camp (5,364 meters / 17,598 feet)

    The last part of the trek takes you to Everest Base Camp. The climax of the entire trek is here where you will actually camp in front of the highest mountain in the world. It’s 3-4 hours walk from the starting point to Everest Base Camp, and it’s 4-5 km (2.5-3 miles).

    The landscape is rocky and uneven, so you’ll be going very slowly not to develop a case of altitude sickness.” You’ll have some pretty good scenery when you ascend to Base Camp, and then you’ll even see a view of the Khumbu Icefall and those mountains that go around them. For other trekking tourists, getting to the Everest Base Camp is the highlight of the trek, and it’s considered an achievement not to be exceeded.

    Day 10: Return to Gorak Shep and Pheriche

    Then after a couple of days at Everest Base Camp you return to Gorak Shep, then climb again to Pheriche, where you spend the night. It is therefore not so tiring to return home from low altitudes either.

    Days 11-13: Trek Back to Lukla

    You will return from Pheriche the way you came, through Dingboche and Tengboche and Namche Bazaar once more before returning to Lukla. The return trek tends to take 3-4 days depending on your pace. The return trek is slightly easier since you are descending to lower altitudes, but you still need to take care of yourself on the steeper parts.

    Tips for Trekking to Everest Base Camp

    1. Food Supply: You need to bring sufficient food for your trek. Don’t hurry the trek.
    2. Physical Preparation: The Everest Base Camp Trek is not a technical trek, but you should be in decent physical shape. You should focus on conditioning, cardio, endurance, strength training.
    3. Weather and Gear:Weather in the hills can be unpredictable. Bring layers, good sleeping bags and good trek boots.
    4. Drink plenty of water: You should also bring some water purifier tablets and drop one in the water after regular time intervals while on the trek.

    Conclusion

    The Everest Base Camp Trek is one of the most rewarding treks in the world. Life at the Everest Base Camp differs in that the basic life blends with sophisticated systems to support man’s survival in extreme altitudes. Basic and not always up to city standards of conditions of accommodation and food developed such a system which keeps nourishing human bodies with intensive and variable intake for high demanding altitude trekking or climbing. If you are planning for Everest Base Camp, book your package from Happy Mountain Nepal for a hassle-free travel.

    FAQs

    1. What type of accommodation can I expect on the Everest Base Camp trek?

    You can expect to stay in teahouses or expedition tents. Teahouses are basic guesthouses along the route, while expedition tents are used by climbers at higher altitudes.

    2. What are the facilities like in teahouses?

    Teahouses have a dining area, shared bedrooms with minimal bedding, common toilets, and limited electricity. Some may charge extra for device charging.

    3. Are there vegetarian or vegan food options?

    Yes, vegetarian and vegan options are available at teahouses. However, it’s advisable to pre-order special diets to ensure availability, especially at higher altitudes.

    4. How long is the Everest Base Camp trek?

    The return trek to Everest Base Camp (EBC) is approximately 130 km (80 miles from EBC to Lukla and return). With acclimatization days, it will take 12-14 days on average.

    5. How difficult is the Everest Base Camp trek?

    The trek is classified as moderate to difficult. Mountaineering experience is not required, but the altitude, a number of daily climbs (5-7 hours on average) and cold weather make it a physically demanding trek.

    6. What is the trek’s main highlight?

    Kala Patthar (5,545m / 18,192 ft), the summit, has a direct view of Everest. Everest Base Camp is at 5,364m (17,598 ft).

    7. How many kilometers was the average daily trekking distance?

    Trekking visitors typically do 8-15 km (5-9 miles) per day depending on how much they go up and down. The most long, arduous day tends to be Lobuche to Everest Base Camp and back to Gorak Shep.

    8. What are the permits to get there?

    Trekkers need two permits:

    • Sagarmatha National Park Entry Permit (KTM/Monjo)
    • Khumbu Pasang Lhamu Rural Municipality Permit (collected in Lukla or Monjo)

    9. What do I bring on the trek?

    The essentials are:

    • Warm layers & Down jackets for cold weather
    • Good boots (well-broken, waterproof)
    • Slouch bag (rated -10°C to -20°C)
    • Trekking poles (useful on steep parts)
    • Water purification tablets

    10. How do I travel to Lukla?

    The standard is to take a flight from Kathmandu to Lukla on a 30–40 minute flight. Flights go through Ramechhap in peak season, which is an extra 4–5 hour drive from Kathmandu.

  • Everest Base Camp Trek in December

    Everest Base Camp Trek in December

    Everest Base Camp Trek in December

    The Everest Base Camp trek is a world-renowned adventure that takes you through the heart of the Khumbu region in Nepal. This iconic journey offers breathtaking views of Mount Everest and other towering peaks, immersing you in the awe-inspiring beauty of the Himalayas. You would get to experience the serene atmosphere in the Everest Base Camp in the winter. 

    everest-base_camp_in_winter

    Weather in Winter for EBC Trek

    The weather and temperature can be quite a challenge to withstand in the Everest region. The peak winter season in Nepal is usually December, January, and February. If you are well-prepared and follow proper precautions, the weather won’t affect you and the trek will be a unique experience and rewarding.

    The temperature during the daytime can be durable but the morning and night temperatures can be extremely cold and harsh. At lower elevations such as Lukla, and Namche Bazaar, the daytime temperature may range from 5 to 15°C and can be warmer but the nighttime temperatures are moderately cold and chilly. At higher elevations like Kala Patthar, EBC, the daytime temperature can be warm and moderate but the nighttime temperatures can be freezing and can lower to -20°C or even lower.

    Location Day Temperature Night Temperature
    Lukla 8°C to 12°C -5°C to 0°C
    Namche Bazaar 3°C to 8°C -8°C to 3°C
    Tengboche 2°C to 6°C -10°C to -4°C
    Dingboche -2°C to 2°C -15°C to -8°C
    Gorak Shep -6°C to 0°C -20°C to -13°C
    Everest Base Camp -3°C to -1°C -18°C to -10°C
    Kala Patthar -10°C to -5°C -26°C to 15°C

    However, Don’t think the base camp is not accessible in the winter season. With proper preparation and precaution, the Everest Base Camp trek in winter can be an amazing experience.

    Risks for trekking the EBC in Winter

    You should consider several risks that you should consider before planning your trek to Everest Base Camp during the winter season. Here are a few of the risks you should consider before your trek:

    1. Intense Cold

    One of the major concerns faced by the trekkers during winter trek is the extreme cold. The weather and temperature can be icy and harsh. Due to the extreme temperature, you may face various conditions such as frostbite and hypothermia. There is also the risk of snowstorms which makes it difficult to navigate the trail.

    2. Less availability of resources

    During the winter season, the weather conditions can make it challenging for the local people to operate lodges and treehouses at higher altitudes. Some of the teahouses may be inaccessible during the winter months due to snow and ice. So, there is less availability of accommodation. 

    3. Unpredictable climate conditions

    The Himalayan region is really unpredictable in terms of weather conditions. A pre-idea about that should be built and the weather forecast should be checked from time to time.

    4. Limited Services

    Many teahouses and lodges operate with reduced services or close completely. Due to the  cold temperature, the locals of the region descend down in the winter season:

    • Fewer accommodation options
    • Limited menu selections
    • Possible sharing of rooms with other trekkers
    • Basic heating facilities (if any)

    5. Cold-Related Health Risks

    There are several health risks that you may face due to the freezing temperature. Here are a few risk that you should be cautious about during your EBC trek in winter:

    • Frostbite risk, especially on extremities
    • Hypothermia danger during rest breaks
    • Increased respiratory issues from cold, dry air
    • Greater challenge maintaining proper hydration

    6. Extreme Temperatures

    Temperatures at higher altitudes can drop to -15°C (5°F) during the day and below -20°C (-4°F) at night. Often, the chill in the wind can make it feel much colder, especially at the more exposed points of the trail. Proper layering now becomes a survival necessity rather than one of comfort.

    7. Limited Daylight

    Winter days are significantly shorter, with only 6-7 hours of reliable daylight for trekking. This means:

    • Earlier start times are necessary
    • Less flexibility in daily schedules
    • Reduced time for photography and rest breaks
    • More time spent in cold, dark conditions

    8. Altitude sickness

    Altitude sickness is one of the major risks that every trekker can face while trying to climb high-altitude peaks. High altitude, freezing temperature, and demanding trail increase the possibility of getting this condition. In the Himalayas, as you go higher above sea level, oxygen levels decrease which might lead to altitude sickness.

    Symptoms that you may face

    • Headache
    • Fatigue
    • Trouble in Sleeping
    • Difficulty in breathing
    • Nausea
    • Loss of appetite
    • Swelling
    • Vomiting

    Precaution that you should follow 

    • Drink plenty of warm fluids and drinks
    • Take time to acclimate your body
    • Eat energy-giving and nutritious foods 
    • Avoid alcoholic drinks, smoking and caffeine
    • If you experience any kind of symptoms, descend to a lower altitude or immediately inform your guide.

    Advantages of EBC journey in Winter

    Although winter trekking can be more difficult, there are several special features and attractions. The following are some benefits of trekking during the winter:

    1. Magnificent vistas: Trekking in the winter offers breathtaking vistas of the snow-covered Himalayas, making it an incredible experience. A magical scene is created by the snow-capped peaks, glaciers, frozen lakes, snow-covered pathways, and icy waterfalls.
    2. Empty/less crowded trails: In Nepal, the winter months are regarded as the off-season for all treks. Therefore, there are less trekkers visiting the Himalayan. In the winter, there will be fewer visitors or perhaps empty trails. It also indicates that you have more time to explore freely.
    3. Better Accommodations: Since it’s the low season, there is less crowd. Hence, the chances of getting an appropriate lodging alternative will be greater.

    everest

    What to bring during the EBC trek in Winter?

    Wintertime, from December to February, might be more prepared for trekking to Everest Base Camp because of the low temperature, snowfall, and other conditions. Here are the things you may need for a safe and comfortable trek:

    1. Clothing (Layering System)

    Base Layer Moisture-Wicking & Insulating

    – Thermal top and bottom-merino wool or synthetic
    – Fleece or wool sweater


    Mid Layer
    Insulation for Warmth

    – Down or synthetic insulated jacket
    – Fleece jacket/pullovers
    – Insulated trekking pants

    Outer Layer (Windproof & Waterproof)

    – Hard-shell jacket: Gore-Tex or similar,

    – waterproof trekking pants

    Other Essentials

    – Lightweight trekking shirt and pant for lower altitudes
    – Down jacket, warm (-10°C to -20°C rating)

    2. Footwear

    • Insulated trekking boots: waterproof & warm,
    • Warm woolen socks: at least 4-5 pairs,
    • Gaiters: to avoid snow entry in boots,
    • Camp shoes for evenings at tea houses.

    3. Headwear & Handwear

    • Thermal Woolen Beanie or Fleece Hat,
    • Balaclava or Buff: to cover your face,
    • UV-protection sunglasses – to avoid snow blindness,
    • Warm gloves – inner liner and waterproof insulated gloves

    4. Personal Items

    • Sunscreen and lip balm having high SPF,
    • Moisturiser- to not let your skin get dry in the cold,
    • First aid kit with high altitude sicknesses pills, pain killers etc,
    • Water Bottles: insulated or hydration bladder,
    • Water Purification tablets or filter,
    • Energy Bars, nuts and Chocolates,
    • Wet wipes & toilet paper – as water will freeze

    5. Miscellaneous

    • Power bank – cold drains battery fast,
    • Extra camera batteries – cold drains battery fast,
    • Trekking map & guidebook,
    • Travel insurance that covers high-altitude trekking


    Is it possible to climb the Everest Base Camp in Winter?

    Yes, EBC climbing is very much possible during winter conditions, with several challenges and risks. You can go only on a climb of the EBC journey when you are well prepared under good supervision and healthy enough.

    It will be rewarding, though you can find plenty of difficulties. The freezing temperature, strong winds, and heavy snowfall will make climbing difficult at the peak. This can be considered as the best time of year to trek EBC if one wants to push through the icy tails, snowy weather, less busy routes, and lodges.

    everest base camp

    Conclusion

    Everest Base Camp Trek in Winter is exciting, incomparable, and full of unforgettable events. The landscape will be a realm of snowy terrain, icy pathways, serene environment, snow-carpeted paths-a pure paradise to imagine and venture into. Remember, winter trekking hence requires more attention in regard to pre-preparation and experience.

    While the rewards are amazing, the risks too are just as significant. Thereby, selection of a reputed trekking agent becomes an absolute necessity.Therefore, Book your trip from Happy Mountain Nepal because we will make your trip more enjoyable and hassle-free.

    FAQs

    1. Is it possible to trek to Everest Base Camp in December?

    EBC in December is doable to trek but not without the right preparation. The trekking is much colder, with more frequency in snowing times. Also, services aren’t that capable and aware as it was in its best peak of the time, although the transparency in skies due to lesser amount of trekkers gives special ambiance.

    2. How cold does it get during the EBC trek in December?

    It starts from -3°C to 8°C in lower altitude during daytime, while during nighttime the temperature may even reach below -20°C and even further lower in high-altitude villages like Gorak Shep and Kala Patthar. The chill factor of the winds will add several degrees to it.

    3. What are the biggest challenges of trekking to EBC in December?

    It gets extremely cold, especially at night. Snow-covered trails make trekking very challenging, and fewer teahouses open with limited services. Be wary of altitude sickness and frostbite. There is less daylight, allowing for only 6 to 7 hours of trekking each day.

    4. Is altitude sickness a bigger risk in winter?

    It is not dependent upon any seasons but in extreme cold or when the trekkers get exhausted; this chance of problem while acclimatization couldn’t be overlooked. Acclimatization, Hydration and gradual ascent to height

    5. Do teahouses remain open in December?

    Most teahouses remain open in big villages, though some at altitude may open depending on the weather and fewer trekkers. It’s always best to inquire about opening in advance and make inquiries to book a place whenever possible.

    6. What gear should I pack for an EBC trek in winter?

    Following winter gear essentials:

    • Clothing: thermal base layers, fleece, down jacket,
    • Trekking boots insulated and warm socks,
    • High-quality sleeping bag (-15°C to -20°C rating),
    • Waterproof gloves, hats, face protection,
    • Trekking poles for stability on icy trails

    7. Is a guide or porter necessary for the winter trek?

    While not mandatory, hiring a guide and porter is highly recommended. Guides ensure safety in harsh conditions, help navigate snowy trails, and assist with altitude sickness. Porters reduce your load, making trekking easier.

    8. What permits are required for the EBC trek?

    • Sagarmatha National Park Entry Permit-for entrance into the Everest region,
    • Khumbu Pasang Lhamu Rural Municipality Permit-replacing the TIMS card, which is a must.

    These permits can be obtained in Kathmandu or Lukla.

    9. Are flights to Lukla affected in winter?

    Yes, flights to and from Lukla become very apt to delays and cancellations with bad weather conditions, snows, and fogs. The better option, in this case, would have extra buffer days in your itinerary

    10. Why choose to trek EBC in December instead of peak seasons?

    Fewer trekkers: relatively noiseless experience. Some brilliant clear views with blue skies Unique winter landscapes with snow-clad peaks Easy availability of accommodations and personalized service to attends